Recent Articles
Saturday 23 March 2013
Saturday 23 March 2013
- 0 Comments
.jpg)
- The user must know what the site is about in seconds: attention is one the most valuable currencies on the Internet. If a visitor can not figure what your site is about in a couple of seconds, he will probably just go somewhere else. Your site must communicate why I should spend my time there, and FAST!
- Make the content scannable: this is the Internet, not a book, so forget large blocks of text. Probably I will be visiting your site while I work on other stuff so make sure that I can scan through the entire content. Bullet points, headers, subheaders, lists. Anything that will help the reader filter what he is looking for.
- Do not use fancy fonts that are unreadable: sure there are some fonts that will give a sophisticated look to your website. But are they readable? If your main objective is to deliver a message and get the visitors reading your stuff, then you should make the process comfortable for them.
- Do not use tiny fonts: the previous point applies here, you want to make sure that readers are comfortable reading your content. My Firefox does have a zooming feature, but if I need to use on your website it will probably be the last time I visit it.
- Do not open new browser windows: I used to do that on my first websites. The logic was simple, if I open new browser windows for external links the user will never leave my site. WRONG! Let the user control where he wants the links to open. There is a reason why browsers have a huge “Back” button. Do not worry about sending the visitor to another website, he will get back if he wants to (even porn sites are starting to get conscious regarding this point lately…).
- Do not resize the user’s browser windows: the user should be in control of his browser. If you resize it you will risk to mess things up on his side, and what is worse you might lose your credibility in front of him.
- Do not require a registration unless it is necessary: lets put this straight, when I browse around the Internet I want to get information, not the other way around. Do not force me to register up and leave my email address and other details unless it is absolutely necessary (i.e. unless what you offer is so good that I will bear with the registration).
- Never subscribe the visitor for something without his consent: do not automatically subscribe a visitor to newsletters when he registers up on your site. Sending unsolicited emails around is not the best way to make friends.
OTHER PRECAUTIONS MUST READ CAREFULLY:-
.jpg)
Please Do Not Abuse If u Not Try This Correctly.
- Do not overuse Flash: apart from increasing the load time of your website, excessive usage of Flash might also annoy the visitors. Use it only if you must offer features that are not supported by static pages.
- Do not play music: on the early years of the Internet web developers always tried to successfully integrate music into websites. Guess what, they failed miserably. Do not use music, period.
- If you MUST play an audio file let the user start it: some situations might require an audio file. You might need to deliver a speech to the user or your guided tour might have an audio component. That is fine. Just make sure that the user is in control, let him push the “Play” button as opposed to jamming the music on his face right after he enters the website.
- Do not clutter your website with badges: first of all, badges of networks and communities make a site look very unprofessional. Even if we are talking about awards and recognition badges you should place them on the “About Us” page.
- Do not use a homepage that just launches the “real” website: the smaller the number of steps required for the user to access your content, the better.
- Make sure to include contact details: there is nothing worse than a website that has no contact details. This is not bad only for the visitors, but also for yourself. You might lose important feedback along the way.
- Do not break the “Back” button: this is a very basic principle of usability. Do not break the “Back” button under any circumstance. Opening new browser windows will break it, for instance, and some Javascript links might also break them.
- Do not use blinking text: unless your visitors are coming straight from 1996, that is.
- Avoid complex URL structures: a simple, keyword-based URL structure will not only improve your search engine rankings, but it will also make it easier for the reader to identify the content of your pages before visiting them.
- Use CSS over HTML tables: HTML tables were used to create page layouts. With the advent of CSS, however, there is no reason to stick to them. CSS is faster, more reliable and it offers many more features.
- Make sure users can search the whole website: there is a reason why search engines revolutionized the Internet. You probably guessed it, because they make it very easy to find the information we are looking for. Do not neglect this on your site.
- Avoid “drop down” menus: the user should be able to see all the navigation options straight way. Using “drop down” menus might confuse things and hide the information the reader was actually looking for.
- Use text navigation: text navigation is not only faster but it is also more reliable. Some users, for instance, browse the Internet with images turned off.
- If you are linking to PDF files disclose it: ever clicked on a link only to see your browser freezing while Acrobat Reader launches to open that (unrequested) PDF file? That is pretty annoying so make sure to explicit links pointing to PDF files so that users can handle them properly.
- Do not confuse the visitor with many versions: avoid confusing the visitor with too many versions of your website. What bandwidth do I prefer? 56Kbps? 128Kbps? Flash or HTML? Man, just give me the content!
- Do not blend advertising inside the content: blending advertising like Adsense units inside your content might increase your click-through rate on the short term. Over the long run, however, this will reduce your readership base. An annoyed visitor is a lost visitor.
- Use a simple navigation structure: sometimes less is more. This rule usually applies to people and choices. Make sure that your website has a single, clear navigation structure. The last thing you want is to confuse the reader regarding where he should go to find the information he is looking for.
- Avoid “intros”: do not force the user to watch or read something before he can access to the real content. This is plain annoying, and he will stay only if what you have to offer is really unique.
- Do not use FrontPage: this point extends to other cheap HTML editors. While they appear to make web design easier, the output will be a poorly crafted code, incompatible with different browsers and with several bugs.
- Make sure your website is cross-browser compatible: not all browsers are created equal, and not all of them interpret CSS and other languages on the same way. Like it or not, you will need to make your website compatible with the most used browsers on the market, else you will lose readers over the long term.
- Make sure to include anchor text on links: I confess I used to do that mistake until some time ago. It is easier to tell people to “click here”. But this is not efficient. Make sure to include a relevant anchor text on your links. It will ensure that the reader knows where he is going to if he clicks the link, and it will also create SEO benefits for the external site where the link is pointing.
- Do not cloak links: apart from having a clear anchor text, the user must also be able to see where the link is pointing on the status bar of his browser. If you cloak your links (either because they are affiliate ones or due to other reasons) your site will lose credibility.
- Make links visible: the visitor should be able to recognize what is clickable and what is not, easily. Make sure that your links have a contrasting color (the standard blue color is the optimal most of the times). Possibly also make them underlined.
- Do not underline or color normal text: do not underline normal text unless absolutely necessary. Just as users need to recognize links easily, they should not get the idea that something is clickable when in reality it is not.
- Make clicked links change color: this point is very important for the usability of your website. Clicked links that change color help the user to locate himself more easily around your site, making sure that he will not end up visiting the same pages unintentionally.
- Do not use animated GIFs: unless you have advertising banners that require animation, avoid animated GIFs. They make a site look unprofessional and detract the attention from the content.
- Make sure to use the ALT and TITLE attributes for images: apart from having SEO benefits the ALT and TITLE attributes for images will play an important role for blind users.
- Do not use harsh colors: if the user is getting a headache after visiting your site for 10 consecutive minutes, you probably should pick a better color scheme. Design the color palette around your objectives (i.e. deliver a mood, let the user focus on the content, etc.).
- Do not use pop ups: this point refers to pop ups of any kind. Even user requested pop ups are a bad idea given the increasing amount of pop blockers out there.
- Avoid Javascript links: those links execute a small Javascript when the user clicks on them. Stay away from them since they often create problems for the user.
- Include functional links on your footer: people are used to scrolling down to the footer of a website if they are not finding a specific information. At the very least you want to include a link to the Homepage and possibly a link to the “Contact Us” page.
- Avoid long pages: guess what, if the user needs to scroll down forever in order to read your content he will probably just skip it altogether. If that is the case with your website make it shorter and improve the navigation structure.
- No horizontal scrolling: while some vertical scrolling is tolerable, the same can not be said about horizontal scrolling. The most used screen resolution nowadays is 1024 x 768 pixels, so make sure that your website fits inside it.
If You Guys Thinks That This Is Nothing Worry About ,So you are waste your time.Its really Works .Only Do that.
And Tell Me If I Wrong!
Friday 22 March 2013
Friday 22 March 2013
- 0 Comments

Google+(Plus) Launches Pages For Google +(Plus). A Businesses solution for Promoting products and sharing news, photos and events, to your customers and Fans. it is very similar to the Facebook Fan Pages. in this Article i show you how to Create and Promote a Fan Page for your Blogger Blog.
- HOW TO CREATE A GOOGLE+ FAN PAGE?
- Go to THIS PAGE and Click on Product or Brand
- Enter the Blog Title and URL as Follows
- Select the Category as WebSite


- Tick the Agree Page Terms check-box and Click on Create Button.

- Enter the Tagline of the Blog and Upload a Profile photo (if any!)

- Your G+ page is almost created. if you wish to share your page with your Google+ Circles, then click the Share on Google+ button and Finally Click the Finish button

- ADDING OFFICIAL GOOGLE+(PLUS) PAGE BADGE
To Grow your fans and Audience, add the official Google+ page badge to your blog.
- After finishing creating page, you will see the page like below. click the get the Badge link.

- You will redirect to this page. and your Google + page ID is automatically added.
- Choose a Style of Badge and Language (Leave the Advanced options to Default).
- Here, you will get Two sections of Code.(Code1 and Code2).

- Go to Blogger Dashboard > Design > Edit HTML
- Search for the </head> tag
- Add the Code1 section before </head> tag and Save the Template
- Add the Code2 section in HTML/JavaScript gadget or place where you want the badge to be appear.
That’s it!. Please leave your comments. And Like It.Thnks!
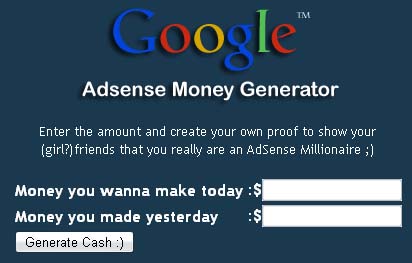
Today while searching web site, I do find a site which helps to generate google adsence money report.
That page is called Google Adsense Money Generator. You can generate any adsence report by giving the “Money you wanna make today and Money you made yesterday. Then press the generate the Generate Cash button , you will able to see a google adsence money report .
I do trying to give you message that don’t trust the fake adsense report which is not real. Beware of Google Adsense Money Generator in further times. Some website publishers trying to say that they have know the top secret google adsence tips to earn more good income from google. Please be truthful in unique income. Try to follow the common rules for get good income form google.
This Information Only I am Provide for aware all peoples in the worlds are going to try these methods but believe me These all are just part of hacking, so please don't do This.They are Fake.It will never generate money for you .
If You Like This Pls comment.Thnks.
Click Here

Net book are ideal, convenient machines for everyday tasks such as surfing the web.
They are great for students, frequent travelers, and those who want a second computer
For occasional use. Ensure you get at least a 1-10-inch screen for comfortable viewing.
Check the keyboard, track pad battery life before making the final decision.
Budget
Your budget will ultimately determine which notebook you buy. The cheapest model will
Fail under the notebook category, with Intel Atom CPU’s and integrated graphics. Entry-
Level notebooks come with 14-15-inch screens and use mainstream CPU’s .You will find
all the essentials integrated, including graphics, sound, LAN, Wi-Fi, and Bluetooth.
Size and Weight
If you are a student or professional who needs to carry the notebook everyday, ensure
The size and weight are not too much to handle. Also ensure the carrybag is comfortable
And ergonomic to avoid back pain.
Gaming and High Performance
The highest-end notebooks have fast CPU’s,lots of RAM and dedicated graphics
Hardware to play the latest hardcore games. These are also suited for heavy tasks such
As video editing and 3D graphics.
.jpg)
Wanna Get Connect Your Old Blogger Profile With The New Google Plus Profile?
Blogger Provides it`s each user a profile independently where he/she can mention his/her details and dislikes and likes.But now Google has launched it`s new social networking site Google Plus.So there is a new option set by Google according to which you can switch your Blogger Profile with Google Plus profile.It`s very easy now to use Google Plus profile for your blogs.
Now whenever user visit your profile, he will be directed to Google Plus profile of your own.This new feature will even help you in getting more transparency in your working with your visitors.
Steps Below Is According To New Interface.So be Carefully Read Them.

Visit Blogger.com (Also Sign In before Proceeding)
Click on The Star Like Button On the Right Hand Side (A drop down menu will appear)
*Click on Connect To Google+
Check the "Terms & Conditions" Button
**Press Switch Now
*If you have not made your Google+ profile then make it first before proceeding.
**Please see the preview before switching the profile.
Google is knows for innovative things and this new prank of Google is really amazing.This prank is created by the Mr Doob.Do you remember "easter egg", made by Google before like snow, tild,do a barrel roll etc. Similarly, Google Gravity is really fun to use.Try it now and give your reviews.
Here is a Live Demo.
See Here--
How to See it Into Effect
There are two ways :
1.Using Google I`m Feeling:
Visit the Google.com.
After that search for the term "Google Gravity"
Click on the first term you see after getting the search results.
2.Using the Direct Link:
If you want to see it working you have to visit the This Link
As soon as you enter into the window you will see the search window contents going down.But don`t worry about the searches.Just type what you are searching for and after that search for the "Google Search" and press it.
How to add it in a Website:-
How about adding this effect in your website.Yes, you can do it very easily with your blog or website.
Add this trick in before </Head> head tag.
<script src="https://rafiblog.googlecode.com/svn/Gravity.js"></scrip
Thursday 21 March 2013
Thursday 21 March 2013
- 0 Comments

Captivating theme will attract your visitor toward sleek design on this theme.Design of this theme is adapted from studiopress themes.Captivating theme is having floating/Sticky header which will help you to drive attention of visitor towards advertisement banner.
Features
- Floating header
- Drop Down Menu
- Good looking Search Box
- Numbered page navigation
- 3 column footer
- Auto read more
- Social Media Buttons
- Best Heading & Block quotes style
- SEO Friendly
- Run In All Major Browser
- Threaded Comment Style
- And More..........
Customization
Drop Down Menu
To Customize drop down menu go to blogger dashboard>>Template>>Edit HTML>>Find <div id='cssmenu'>
Below <div id='cssmenu'> You Will find-
<div id='cssmenu'><ul><li class='active '><a href='/'><span>Home</span></a></li><li class='has-sub '><a href='#'><span>Products</span></a><ul><li><a href='#'><span>Product 1</span></a></li><li><a href='#'><span>Product 2</span></a></li></ul></li><li><a href='#'><span>Fashion</span></a><ul><li><a href='#'><span>Product 1</span></a></li><li><a href='#'><span>Product 2</span></a></li></ul></li><li><a href='#'><span>About</span></a></li><li><a href='#'><span>Contact</span></a></li></ul></div>
Now Replace # with Link you want.
Footer Menu
To Customize menu above footer go to blogger dashboard>>Template>>Edit HTML>>Find <div class='menufooter'>
Below <div class='menufooter'> You Will Find-
<ul id='menu'>
<li><a href='/'>Home</a></li>
<li><a href='#'>Products</a></li>
<li><a href='#'>Services</a></li>
<li><a href='#'>About</a></li>
<li><a href='#'>Contact</a></li>
</ul>
Now Replace # with Link you want.
Social Media Buttons
To Customize Social Media Buttons go to Blogger dashboard>>Template>>Edit HTML>>Find <div class='socialas'>
Below <div class='socialas'> You Will Find-
<a href='##' target='_blank' title='Grab Our Rss Feed'><img alt='Icon' border='0' src='http://1.bp.blogspot.com/-8d6WoxtW-6A/UO5dOoiejuI/AAAAAAAAIaY/kOTmjk3ToB0/s1600/rss-feed-icon.png' style='margin-right: 2px;'/></a><a href='##' rel='nofollow' target='_blank' title='Like Our Facebook Page'><img alt='Icon' border='0' src='http://1.bp.blogspot.com/-I343hC5Yygo/UO5c8be8fFI/AAAAAAAAIaA/sFFp7a58Gb4/s1600/facebook-icon.png' style='margin-right: 2px;'/></a><a href='##' rel='nofollow' target='_blank' title='Follow Our Updates On Twitter'><img alt='Icon' border='0' src='http://4.bp.blogspot.com/-g6WKM4rpIuc/UO5c9JTeZlI/AAAAAAAAIaI/4Up-b_99Vl8/s1600/twitter-icon.png' style='margin-right: 2px;'/></a><a href='##' rel='nofollow' target='_blank' title='Follow Us On Google+'><img src='http://3.bp.blogspot.com/-fIupIBa5l80/UO5c8RETrlI/AAAAAAAAIZ4/5Or9a0DAQpc/s1600/google-icon.png' style='margin-right: 2px;'/></a><a href='##' rel='nofollow' target='_blank' title='Follow Our Pins'><img alt='Follow Me on Pinterest' src='http://1.bp.blogspot.com/-PXmQaBBfRMg/UO5c8vnEPsI/AAAAAAAAIZ8/RuVemyAaNBo/s1600/pinterest-icon.png' style='margin-right: 2px;'/></a>
Now Replace ## with Link you want.

If you don't have a person gmail account (must not be your education gmail, such as University of Minnesota gmail account), go ahead and create new gmail account now. It's important that you don't use your official education account as it doesn't have all the features that personal gmail accounts do.
IMPORTANT: When you use your personal gmail account and your personal blog, you should use a different browser than the one that you use for your official education/university gmail, otherwise this causes problems. e.g. I use Firefox for my University of MN gmail, and Chrome for my personal gmail and personal blog.
- Once you have created a personal gmail account, link to the https://blogger.com/start website Click on the orange arrow that says "create your blog now." On the "Create a Google Account" screen enter in the information required, namely: Enter your personal gmail email address, which should be the one that you want to use to be paired with your blog that you are going to create [must not be your official education one. You'll have to retype your email address in the second box.
- Enter password (it's a good idea to write this down somewhere safe -- or email it to yourself and then save the email so you can refer to it later if you forget it). You have to retype the password in the second box.Enter a display name Choose a user name. If you prefer people not to know who you actually are, then choose a fictitious name. e.g. 2tech4me. Accept the terms (it is safe to do and won't generate junk mail). Word verification: type the letters that appear as a graphic above the verification box. This is there to ensure that the blog is being created by a person and not automatically being generated by a computer.
- Click on the "Continue" arrow On the "Name your blog" screen:
- Enter title: This is the title that will appear at the top of your blog page and will also be the default name that will appear in users' browsers when they bookmark/add to favorites you blog, so choose something that will give readers a clear idea of what your blog is about
- Blog address: pick something that you'll remember easily and that is easy to type.
- Click on the "Continue" arrow
- On the "Choose a template" screen:
Scroll through the selections and click on the little radio button next to the name of the template that you choose. e.g. I chose the snapshot template. Note: you can change the template later if you decide you don't like the one you have selected, so don't spend too much time at this point worrying what will look best!
- Click on the "Continue" arrow
- On the "Your blog has just been created!" screen:
- Click on the "Start Blogging" arrow
A window will appear that looks much like a word processing window. Start typing, and use the formatting bar at the top to help you format your entry. e.g. You can change font size, type of font, color, justification, create links and so on. Experiment with these to see what they do.
- When finished, click on "Publish Post"
Once you have posted an entry, a screen will appear telling you "Your blog post published successfully!"
To see the results, click on the link to "View Blog."
To get back to your blog so that you can add a new entry or edit the existing blog, click on the little orange "B" next to the search field at the top left of your browser window. If you are already logged in, this will take you to your blog Dashboard. If you aren't logged in, then you will first need to log in (using the user name and password that you set up when you created your blog -- that's why it's important to write down what these are when you first create your blog).
- From the Dashboard you can:
- create a new post (a new blog entry): click on the "NEW POST" button
- change your blog settings (don't worry about this now, but do explore later)
- edit your existing posts: to do this, click on "Edit Posts" --> this takes you to a screen that gives you the option of creating a new post or editing your entries. To edit entry, click on the "Edit" link next to the entry. This opens the blog in editing mode, and you can go ahead and edit to post blog once you are done editing, click on the orange "Publish Post" button (which takes you to "Your blog post published successfully!" window, and from there, click to "View Blog").

After you’ve gained access into your blog and see the default theme, type in the following: /wp-login to get to the main URL. From there, log into it using the information you just created in step 2. You also have the option to login using the login link on the homepage, which you’ll find on the right sidebar.
www.forexample.com/wp-login
What you’ll see immediately are quick-links to posts, pages, comments, tags and change WordPress theme. Get familiar with the dashboard. On the left hand side of the screen, you’ll see the sub-menus. They have a purpose but place your attention on the more important ones for now. These include:
- A – Appearance – This part will allow you to customize the look of the blog including the theme, sidebar widgets and menus. There are all kinds of things you can do to customize the blog.
- B – Links – Here, you’ll be able to produce a number of links and links categories to use in the creation of your customized sidebar widgets.
- C – Media – This menu allows you to manage pictures and videos you’ll include on the website.
- D – Pages – Use this section to include new pages to the blog. Brose the various options like adjusting the template, modifying the page order, disabling/enabling comments, etc.
- E – Plugins – When used correctly, plugins can be quite useful. There are a ton of third-party plugins that will increase your blog’s visibility, its performance, style, look, etc.
- F – Posts – Since you’re running a blog, you’ll be posting often. Generate posts inside WordPress and choose what page to display them on, the date you want them published, publisher’s name and determine if you want anyone commenting.
- G – Settings – With the settings section, you’ll set up the blog’s name, description, front page display, date format, etc. Here, you can mess with the third party plugins.
- H – Users – This section is about the changing of or addition of existing user settings such as emails, passwords, profiles, etc.
Now, if you’ve done everything in the above 5 steps, your blog should be up and running! And, if it is, you just need to add in some wonderful content and look at the different themes for your blog. If you’re still having issues, consider going through the steps once more and determine where it is you might have flubbed. And, don’t worry, it happens! Before you know it, you’ll have a great blog with lots of visitors. Good luck!

Mistake #1: Treating Your Blog Like a Press Center
The number one mistake that business bloggers make is to treat their blog as an extension of their current press center. Repeat after me: Your blog is not the place for press releases. Blogging is a conversation and it offers a way for your customers to connect with your business on a completely new level. Press releases, on the other hand, are the exact opposite. They're impersonal, they're self promotional, and most readers don't trust them. If you use your blog to republish press releases your customers will have no reason to keep reading and they'll also likely not trust your content.How to Avoid: First, don't ever put out a press release on your blog. You can use your blog to make product or other business announcements, but do so with original writing and in a more casual voice. Second, do use your blog to write about things other than your core business. Share your thoughts on your industry, share insights into the day-to-day work life and processes at your company, and provide tips and tricks you have learned during your time in business.
Mistake #2: Not Blogging Regularly
Think about the blogs you read on a regular basis — how many of them publish only sporadically? Most successful blogs put out new content at least a couple of times per week and try to stick to a regular schedule. Consistently putting out quality content will keep readers returning and over time it will help you build a community and turn your customers into fans.How to Avoid: Blogging regularly isn't easy, so to avoid burning out, brainstorm editorial ideas ahead of time. If you plan to put out new posts every Tuesday and Friday, for example, try not to start writing Tuesday's post on Tuesday morning. Get other people at your company involved so that one person isn't shouldering the entire blogging load, and even consider sourcing content from your customers. Remember that anything can provide fodder for a good blog post, so pay attention to the things you read or see on other blogs, newspapers, magazines, or television.
Mistake #3: Not Enabling Conversation
As I already said, blogging is a conversation, and not allowing it to occur on your blog is a mistake. It's true that blog comments can open you up to criticism, but blogging is an unparalleled opportunity to connect with your customers. You'll get a lot more out of blogging if you enable — and even encourage — your customers to respond to what you write.How to Avoid: Obviously the first thing you need to do is enable commenting on your business blog. But beyond that, you need to remember that the conversation is two-way. Get in there and respond to the comments readers leave on your blog and you'll be more likely to develop a community around your writing that can help turn your customers into fans who will evangelize your products and services and provide you with quality feedback. You should also participate in the conversation on other blogs in your industry by leaving comments on posts elsewhere around the blogosphere. That will help you to establish your "blogging brand" and bring new readers your way.
Mistake #4: Making New Content Hard to Discover
Your blog won't be very helpful to readers if they aren't able to easily find new content. You need to make your blog discoverable and you need to make sure that when you add new content, your regular readers will be able to find it.How to Avoid: There are a few ways to make sure your blog content is more easily discovered.
- Make your blog easy to find by linking to it prominently from your company's web site and including your blog's URL in your email signature, on your business cards, and in sales and marketing collateral.
- Use a full RSS feed (because the goal with most business blogs should be to get read, not boost page views) and make it easy for your readers to find and subscribe to.
- Embrace social media technologies like Twitter and Facebook as a way to notify your fans and followers of new blog content, and make it easy for your readers to share content with each other through social media channels and via email.
- Optimize for search engines by putting relevant keywords in post titles and URL slugs and write about the things that your customers are most likely to be searching for — but avoid sounding artificial simply so you can stuff some more keywords into a post.
Mistake #5: Expecting Too Much, Too Soon
Blogging isn't a sprint, it's a marathon. Your blog won't be an overnight success, and for the first few months it might feel like you're writing for no one. It can take time to build up your readership and have a regular community of people who participate on your blog. Don't expect immediate returns from your blog and do expect to put in a lot of hard work.How to Avoid: Set attainable goals and realize that you're in it for the long haul. Don't cancel your blogging efforts after three months — give it at least a year of regularly putting out quality, original content. And make sure that your blog is easy to find, and that your readers are able to easily comment and share posts with others.

For many people, editing the template is acceptable, because it is the only way to do what they want (remove the attribution, show a gadget on the homeppage only, add a Facebook like button to posts, etc).
In general, the process to follow is:
Open the template-editor
Make a back-up copy of the template, as it is now
Make the change
Check that it works, and if not, go back to the previous template.
The new Blogger interface has added a couple of extra "twitches" to these steps, though. Read on to learn more:

Log in to Feedburner, using the Google account that owns the feed.
Click on the name of the feed you want to provide a subscription tool for.
Choose the Publicize tab.
Choose the Chicklet Chooser option, from the left navigation bar.
Choose one of the options shown: the default one is the standard-size RSS-radar-button.
Scroll to the bottom of the screen and either Copy the HTML that is shown, and add it to your blog in the same way that you would add any other 3rd party HTML,
OR
Choose Blogger from the drop down list beside "use as a widget in", and click Go.
This takes you to a Blogger screen where you can choose which blog you want to add the gadget to (if your current login has more than one), and what title to use for it.
When this is done, click Add Widget.
This takes you to the Design > Page Elements tab, where you can drag-and-drop the widget to wherever you want it.
(When I tried it just now, instead of the layout screen I got a "bad request" message. However pressing Save and then View Blog brought up the blog with the gadget showing, and I was able to go back and edit the layout later on).
Wednesday 20 March 2013
Wednesday 20 March 2013
- 0 Comments

In this tutorial you’ll learn how to add it to your blogger blog.
and you’ll learn how to customize
change the verb, like or recommend.
change it’s color.
change it’s font.
Step 1. adding it to your template.
The button code is given below for copy & paste....
<b:if cond='data:blog.pageType == "item"'> <iframe allowTransparency='true' expr:src='"http://www.facebook.com/plugins/like.php?href=" + data:post.url + "&layout=standard&show_faces=false&width=100&action=like&font=arial&colorscheme=light"' frameborder='0' scrolling='no' style='border:none; overflow:hidden; width:450px; height:40px;'/> </b:if>
where to add it ?
Log into your blogger account, then go to Layout >> Edit Html.
Before doing any thing you must check [Expand Widget Templates box].
And find the next Code.......
<div class='post-header-line-1'/>
And after it, paste your button code
What, If you didn’t find the code above in your template, The try to find the following,
<data:post.body/>
And paste the button code Before it.
click Save Template and you are done.
Some might use blogger old interface. But the old blogger interface will not be available in future. That means old interface retires.
So I write about ‘How to Change Blogger Template in New Blogger Interface’. Below are the step by step procedures to change the blogger template.
1. First download a new blogger template. Lots of templates are available in internet for free.(update: I have collected list of 100 websites to download free Blogger templates to help you to find a best template.) Download a template which you want. The blogger template you downloaded will be an xml file or text file.
2. Login to blogger.You will get your list of blogs
3. Then go to ‘template’ section as given in below image.

- Then click ‘Backup/restore’ button which will be at the right top corner.

- A lightbox window will open with two options. First one ‘download full template’ is for making a backup of current template and second one ‘upload’ is for choosing a template from your computer and upload it to change the blogger theme.

If you want, you can take backup.
To change the template first click ‘choose’ and browse for the template you download and then click upload.
This is one of those topics that many would think is too obvious to get so much attention—but they’d be wrong.
Robert D. Smith shows even the most experienced email writer how to improve their technique in this short, sharp post that combines psychology, etiquette, and good old common sense. Are your emails getting the responses you want? Make sure they do in 2013!
- Make Money From a Low-traffic Blog .
Nathan Barry’s no-holds-barred story of how he build a product, and sold it strongly, from a blog with low traffic is nothing short of inspirational. One of the great things about it is how honest he is, and how clear he makes the path to success.
This is a must-read for anyone who’s put off by the traditional make-money-blogging stories and wants to get a head-start on generating income.
- 15 Social Media Mistakes That Are Strangling Your Success
This post provides a full tour of social media mistakes that, surprisingly, we’re still making today.
In it, Georgina takes us back to basics in this post, which, again, would make a good checklist for bloggers to assess their social media efforts every so often.
- Can you REALLY Make Money Blogging?
Last year marked my tenth anniversary of blogging, and this post encapsulates the key learnings I’ve gained about making money over that time.
As you’ll see in the comments, the post resonated strongly with a broad cross-section of our readers, and provided much-needed inspiration for many. If you want the truth about making money blogging, look no further.
- How to Set Up an Email Account that Uses Your Domain Name
Kashish hit a nerve with many readers with this post.As you’ll know if you read post 7 above, having a legitimate email address is critical to being taken seriously online. This post—and the comments that follow—will help you set one up quickly and easily.
Thursday 20 December 2012
Thursday 20 December 2012
- 0 Comments

1. Use a Cache Plugin
Serving cached versions of your pages is one of the most efficient ways to speed up your site and to reduce the CPU and memory consumption on your server. Also, if you are not using the W3TC plugin yet I highly recommend you switch to it, as it works much more efficiently than the other plugins available.2. Remove All Unnecessary Plugins
Unless your site absolutely relies on a plugin to work I would recommend removing it. Sure, you might need to lose a functionality or two, but in the long run this will keep your site running fast and securely. Keep in mind that it’s possible to hard code what some plugins do, as well. For example, instead of using a plugin to generate a list of “Popular Posts” on your sidebar you could create the list yourself with raw HTML. Instead of using a contact form plugin you could simply write a paragraph on your “Contact” page including your email address there. So on and so forth.3. Pay Special Attention to Post-Level Plugins
On most WordPress sites and blogs, the bulk of the traffic goes to the posts. The homepage, the category and archive pages receive around 20% of the overall traffic, if that, while the posts receive 80%.
This means that plugins that act at post-level will consume most of your resources. Examples include plugins to change SEO aspects of your posts (e.g., All in One SEO Pack), plugins to display related posts and so on. As a result you should put an extra effort to either remove or optimize those plugins (more on that below).
4. Consider Substituting All In One SEO Pack
The All in One SEO Pack plugin is certainly one of the best SEO plugins around, but it’s also pretty intensive on the resources of your server. For small sites this won’t be a problem, but once your traffic starts growing you might start to feel it.A good alternative is called Greg’s High Performance SEO. According to the author All in One SEO Pack outputs 2000 lines of code per page load/view, while Greg’s plugin output only 700 lines.
In my opinion the main benefit of those SEO plugins is the ability to customize the title tag. If that is the most important factor for you as well you can be even more extreme and use no plugin at all. Instead use the piece of code below to create optimized title tags for your posts:
<title><?php if (is_home () ) { bloginfo(‘name’); }elseif ( is_category() ) { single_cat_title(); echo ' - ' ; bloginfo(‘name’); }elseif (is_single() ) { single_post_title();}elseif (is_page() ) { single_post_title();}else { wp_title(‘’,true); } ?></title>5. Consider Substituting YARPP
Along with All In One SEO Pack there’s another plugin that is very popular and yet very resource intensive: YARPP (Yet Another Relate Posts Plugin).One alternative you can consider is the Efficient Related Posts plugin. The main difference is that the database of related posts is updated only when a post is created/updated, while other plugins tend to build the list on the fly, whenever a post is loaded.
6. Optimize Your Database Tables
As with any dynamic content management system, great part of the work your WordPress site does is related to getting, storing, removing and updating information on its database. That’s why optimizing your database tables can affect your site’s performance.Thursday 15 November 2012
Thursday 15 November 2012
- 0 Comments
If your blog has a dynamic template, then use the see-all-posts icon for the blog to get into it the blog-options screen for the blog that you want to edit.
When you are in the see-all-posts mode, the the address bar in your browser is like this:
http://www.blogger.com/blogger.g?blogID=5381944372668369653#allposts/postNum=0
Copy your blogID number - that is, the digits between blogID= and #allposts (it's bold in the example above)
Go go
http://www.blogger.com/html?blogID=NNNNNNNNNNNNNNN
where you have replacd NNN... with your blogID
Using pre-Sept-2011 Blogger, AKA the old UI / version of Blogger :
Go to the Design > Edit HTML tab
Using post-Sept-2011 Blogger, AKA the new UI / version of Blogger :
Go to the Design tab
Click Edit HTML
Click Proceed


Note: the last time I tried this, it automatically opened in the old interface's template editor. As always, make sure you take a backup copy of the template - see instructions below before changing this.

Windows Task Manager is used to view details about processes running on your computer. Since it can be used to terminate programs that are misbehaving or are viruses disguised in the form of harmless programs, most spyware and viruses disable it to prevent themselves from being closed through it. Some administrators also disable Task Manager to prevent users from closing important security programs like antiviruses and anti-malwares.
In such situations, running the Task Manager will give the "Task Manager has been disabled by Administrator" error. However, there are some techniques you can use to re-enable task manager and close those harmful programs manually. This article contains few such simple techniques you can use to regain access to Task Managing privileges.
Registry Editor is an inbuilt Windows tool that is used to modify registry keys which tell Windows how it should work. A simple registry modification can be used to bypass the Task Manager block. To do so, just follow the steps:-
Click on Start. Go to Run. If you use Windows 8, Windows 7 or Windows Vista, go to Search.
Type regedit and press Enter. Registry Editor will start. If Registry Editor is also disabled, you will first need to enable registry editing.
Through the left hand navigation pane, navigate to HKEY_CURRENT_USER\Software\Microsoft\ Windows\ Current Version\Policies\System. If the System key is not there, you will need to create it.
In the work area, locate "DisableTaskMgr". If this value is not there, you will need to create a new DWORD value called DisableTaskMgr. Double click on it. A window will pop up.
Enter its value data as 0 and press OK.
Close Registry Editor. If Task Manager is still disabled, Restart your computer.
Thursday 8 November 2012
Thursday 8 November 2012
- 0 Comments

Previously I've explained how to remove the (ugly and confusing) "Subscribe to Posts (atom)" link from your blog, and why RSS / Subscribe to Posts is important to your blog and how to create a Feedburner feed for it.
But an RSS feed is useless unless people subscribe to it. So as well as making the feed, you also need to put something in your blog that lets your readers sign up for it.
A standard option for this is the orange square with "radar" markings on it, which many people call a "chicklet" (since it lets your viewer - the chicken? - have access to the feed you are providing).
Feedburner also has options for:
Using a custom icon from popular web aggregatorsI'm not sure that this is a great idea, because you don't know what feed-reader software your readers actually use, and the whole point of a feed is that you don't dictate how people see your blog.
Using an icon that promotes Feedburner. This cute, but I've never seen anyone use it.
Thursday 18 October 2012
Thursday 18 October 2012
- 0 Comments

How do I add Adsense code inside blogger post, below the Title?
In blogger, by default, we can only display ads on top of our posts, under the posts and on the side bars. However, we often see some blogs with Adsense ads place inside the post body.
In the first place, why place an Ad below your post title?
Below the post title is the position with the highest CTR (click-through rate). In other words the ad placed there will have the highest number of clicks and hence earn the most money. That's most probably your reason for blogging. Enough of that. Let's get started.
Get the Ad code from your adsense account, preferable either a 300x250 Medium Rectangle or 336x250 Large Rectangle ad unit.
Parse the ad code in a parser to escape special characters in the code. The ad won’t appear if you use the original unescaped ad code.One of my favorite javascript/adsense parsers can be found at Blog crowds.
Copy the parsed code.
Now follow these steps:
Login your Blogger AccountClick on Design >> Edit HTML
Check the “Expand Widget Templates” box.
(Important!)Download your full Template in case you screw up somewhere.
Then find the following code(Ctrl+F)
<data:post.body/>
Paste your parsed adsense code on top of it.
And you'll have:
Your ad code
<data:post.body/>
That's it! It's that easy.
Oh no, one more thing, your ads will display below post titles on all pages(home page and individual post pages). If you wish for it to be applied just on post pages, add the following lines of code:
<b:if cond='data:blog.pageType == "item"'>
Place your ad code here
</b:if>
<data:post.body/>
Thanks For Reading
- 6 Warning Signs That Your Blog is Deflating
Again, another handy post that provides invaluable pointers that help bloggers recognize a downturn and do something about it before it’s too late!
Ashkan’s advice here is clear and straightforward, and the suggestions offered by readers in the comments make a great addition to this post. Why not make it a monthly checklist for your blog in 2013?
- Backing Up WordPress? Don’t Make These 9 Mistakes
We all need backups, but few of us know if we’re doing all we should to protect our online assets.
As Anders Vinther reveals, backups aren’t something that we should be leaving to our blog hosts, or our developers. This is a topic every blogger needs to be on top of, so if you’re not in that camp, check this post out now.
- 4 WordPress Alternatives: The What, Where, and Why
You’ll have noticed a prevalence of WordPress-related posts on this list. But not everyone is on, or wants to use, that platform. Here, Matt Setter steps us through four handy, functional alternatives, explaining who they’re for, and what they do.
If you’re starting a new blog, or looking to move an existing blog, in 2013, maybe you’ll also look for different functionality and flexibility than WordPress offers. If so, this post is for you!
Saturday 6 October 2012
Saturday 6 October 2012
- 0 Comments
There are several ways to post a video to your blog. To get started, follow the steps listed below.

Click the black and white clapboard icon on the Post Editor toolbar.
In the popup window, you'll see four options:
Upload:
You can browse for a upload a video from your computer. If this is your first video upload, you must agree to the Terms and Conditions.
From YouTube:
You can search YouTube and select a video to display on your blog.
My YouTube videos:If you have your own videos under you Google Account, you can easily access and upload them through this tab.
From your phone:
If you have Google+ and Android, you can download an application that will allow all the videos from your phone to upload instantly to your Google Account. You can then click From your phone and select a video from your phone to publish on your blog. All content instantly uploaded from your phone is private until you choose to share it.
Subscribe to:
Posts (Atom)


.jpg)


